Guide: How to Create a Unique Photograph
Finding a great location, capturing the right mood, shooting at the right time, and having the right material is essential for creating a unique and successful photograph. While it’s great to keep your camera ready at all times and not to let it fade away in your camera bag, you still need to plan everything to improve your chances of shooting a unique photograph.
We’ve listed the most important parts of the planning process below.
Page Contents
Create a mood board
When you are about to leave for a trip, there will be nothing more important than translating the setting and the vibe that you’ve got in mind towards the final picture. To help you achieve this goal, we suggest creating a “Mood Board”.
Simply put, mood boards are a collection of images that convey the theme, style, direction, and inspiration for your shoot. It wouldn’t make sense to photograph your model on a farm when you’re trying to create an adventurous vibe.
While building your mood board, you’ll probably stumble upon some photography concepts from strangers on Pinterest and Instagram. Make sure to take a look at what they have done, and note what they did to improve their shots.
Scout your location
Another critical point that will help you to get your perfect shot, is your location. We advise you to put some thoughts in your location since the contextual location mather and might make – or break – your shot.
While you can do a regular google maps-scout, we advise you to do an actual technical visit so you don’t stumble upon (physical or virtual) roadblocks. You’d like to bring your gear already, so you can test the background and find your perfect angles. While you’re there, make sure to look at the details. (When is the perfect lighting? Is it a high traffic location? …)
Not sure how to find your location? Be creative! Do some research and talk to other photographers.
Practical tip: Police your location: the perfect photoshoot location can be ruined by weeds, an overlooked paper cup, or a bunch of cigarette buts you never saw – until after the session ended. Be sure to walk around the area and pick up all trash and remove weeds that may adversely affect your image. Having a rake and a garbage bag along can help.
Location scouting with Google Maps
Normally, we advise photographers to do an actual technical visit at the location they want to shoot so they don’t stumble upon (physical or virtual) roadblocks. However – from our own experience: When we’re visiting another country, this might not be possible.
That’s why we advise you to use the Google Maps app to plan your photoshoot if you can’t do a technical visit. This app is so powerful and contains so much detail to the point you can even plan where to put down your tripod and where you want your model to stand.
The first thing we want to do is to run the location we had in mind through Google Maps (in the 3D view) and get an idea of how the environment looks like: What’s the surface? What does the neighborhood look like? Where should I stand to shoot in a straight line to your background?
The next thing we’d like to do is run every spot we found, through the “Street view” function, so we can look at the point-of-view from that spot, and decide if we’d like to use it as a photoshoot location.
Make the most of your location with PhotoPills
The PhotoPills app essentially provides us with plenty of useful information based on your location such as an exposure calculator, but it also displays the location and position of the Galactic Center, calculates the timelapse of the sun, and so much more.
This makes it easier planning your shot since you can exactly calculate the place of the sun and how it will impact your shot. This way, you can anticipate getting the most of your location by shooting it exactly during the sunrise.
Bring the right material
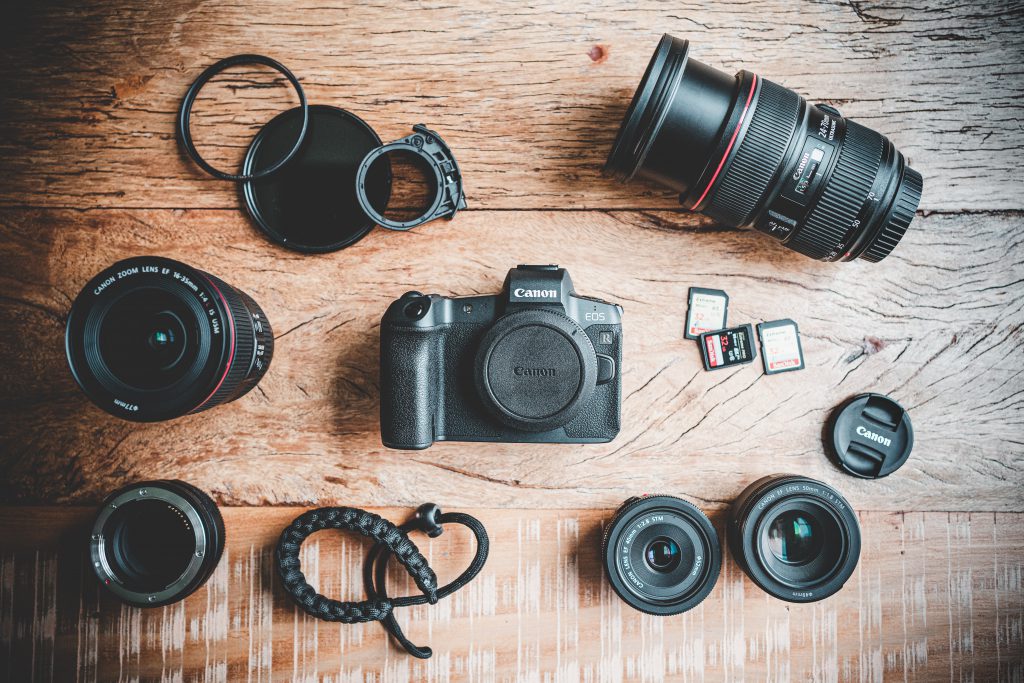
We’ve listed a few items you might like to pack and bring for your shoot, it might smoothen up a few things.
Lenses
The lens you use to shoot landscapes is almost more important than the camera body you use, and for landscape photography, there are four main types of lenses that are commonly used: wide-angle lenses, standard zoom lenses, telephoto lenses, and prime lenses.
Wide-angle lenses
The most popular lenses for landscape photography are wide-angle lenses which have a low focal length, meaning the range varies around 14-35mm. This is because these lenses allow you a wide range of view (as the name suggests), and have a big aperture (which decides the depth of field). As a result, it’s easier to make pictures where both the foreground and the background look sharp.
Prime lenses
A prime lens has a fixed focal length (24mm or 35mm) and is unable to zoom. They are most often used for photographing landscapes at night because they have a very big aperture.
Standard zoom lenses or Telephoto lenses
The standard zoom lenses (usually 24-70mm) and the Telephoto lenses (these long lenses with a 70-200mm focal point) are mostly used to zoom into a landscape to crop out a distracting object or to focus on animal photography since their aperture isn’t amazing.
Don’t forget: Lenses are usually the most expensive part of your equipment. So for beginners, we advise you to look into borrowing or renting a lens to try it out before you buy it.
Lens Hoods against flairs
The lens hood – also known as a lens shade – is a plastic attachment for the front of your lens, meant to block sunlight from causing a flare effect in your photographs.
Lens filters
As the name suggests, Lens filters are filters that are attached to the lens to enhance colors, reduce reflections, or protect the lens from scratches. Most of the effects created by these filters cannot be reproduced in post-processing, making them a necessity for landscape photographers.
The most used filters are the polarizing filters – which reduces reflections and darkens the sky, and Neutral Density Filters – which reduces the amount of light entering the lens, making waterfalls look smooth.
Tripods & shutters
For photographers who like to shoot during the night, we advise looking into bringing a tripod and even a remote shutter. This will help you to reduce movement and will help you to keep your shots sharp when using a longer shutter speed.
Shoot at the right time
You’ve put so much time in finding your location and creating your mood board, you’d want to make sure you shoot at the perfect time! We know some photographers like to use an app that predicts the perfect time, but in general, you should shoot:
- During overcast days: always, because you’ll avoid shadows & glare
- Sunny days: morning before 11 am, or evening after 4 pm.
- If you have to shoot at noon on a cloudless day, work around the direct light by repositioning your model and keeping the sun behind you as much as possible.
Camera settings – always shoot RAW!
We’ve mentioned it before, but you should always shoot in RAW. This is because this file format captures all image data recorded by the sensor when you take a photo, while JPEG images are compressed and are losing a lot of details.
No information is compressed with RAW, so your photo contains more details and you’ll be able to edit them precisely into higher quality images with our travel Lightroom presets.
Stay consistent
Whatever kinds of Lightroom preset you use, select no more than three to bounce back and forth with when editing a series of photographs. It’s not that you want every image to be a direct clone of one another, there should undoubtedly be an underlying look or feel to the full gallery.
We suggest sticking to your preset and just adjusting the brightness, HSL, saturation, and contrast according to each picture’s composition and lighting. Once you discover your favorite presets that work, stick with it!

